
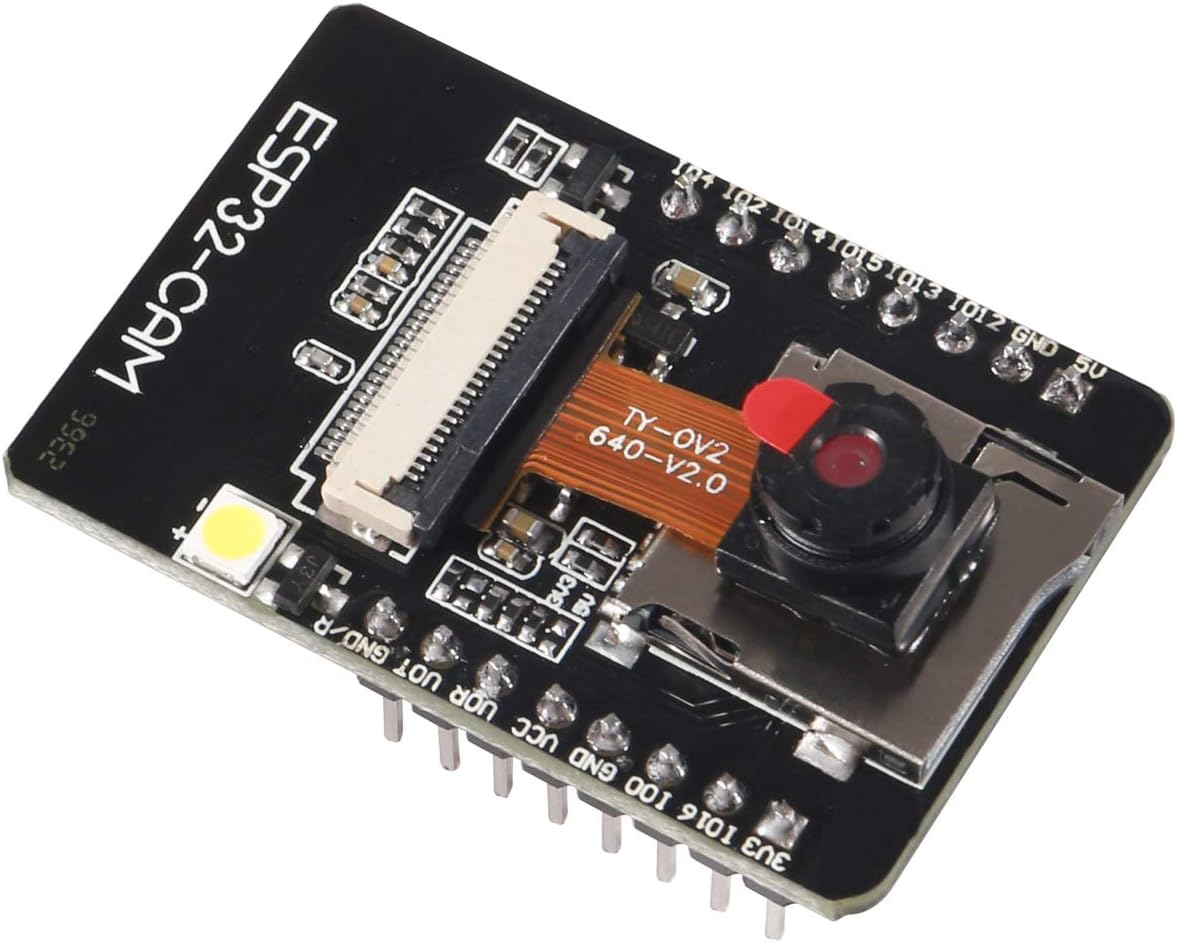
The ESP32-CAM camera module is a small and compact design,
based on an ESP32 chip with an OV2640 2MP camera, built-in flash, and also
supports OV7670 cameras. It is fully compliant with WiFi 802.11b/g/n/e/i and
Bluetooth 4.2 standards, has 9 GPIO ports, and supports UART/SPI/I2C/PWM and
other interfaces.
ESP32-CAM features:
Uploading code using FTDI:
Connect the ESP32-CAM board to your computer using an FTDI
programmer. Follow the diagram below:

Many FTDI programmers have a jumper that allows you to
select 3.3V or 5V. Make sure the jumper is in the right place to select 5V.
Note: ESP32-CAM doesn’t come with FTDI.
To upload the code, follow the next steps:
1) Go to Tools > Board and
select AI-Thinker ESP32-CAM.
2) Go to Tools > Port and
select the COM port the ESP32 is connected to.
3) Then, click the upload button to upload the code.
![]()
4) When you start to see some dots on the debugging window,
you may need to press the ESP32-CAM on-board RST button if it doesn’t go
automatically into flashing mode.
After a few seconds, the code should be successfully
uploaded to your board.
Resources:
https://randomnerdtutorials.com/esp32-cam-video-streaming-face-recognition-arduino-ide/
No review given yet!
 Fast Delivery all across the country
 Safe Payment
 7 Days Return Policy
 100% Authentic Products


You need to Sign in to view this feature
This address will be removed from this list


